Welcome to my Crafting Blog! I'm an avid Stamper, Scrapbooker and all things Crafty! I'm looking forward to sharing my crafting adventures with you!

Sunday, November 4, 2012

A Planbook ala Carrie

Inspiration:  I {Heart} Organizing Of Course! With a Dash of the Nest/Learning Effect!

So earlier in October, I saw a post by the fabulous Jennifer Jones about how she created her own Blog Planner.  She printed her own pages, added free dividers, and had it bound inexpensively at Staples.  This got me thinking........dangerous I know.

As a teacher I have this ugly, boring, county-issued plannbook.  In fact most of my teacher friends have the same one.  While it is functional, it lacks personality.  I find myself trying to make it my own and failing miserably every year.

Here is what I have come up with. (Pardon the Glare)


I made a cute cover using a Chevron Paper, Embellishments, and my new favorite font KG Be Still and Know (thanks Tiffany@Learning Effect for getting me hooked!)

The first section is my schedules section.  I included my schedule that I turned in to the tech office as well as all of those crazy schedules our school makes: early dismissal, late opening, celebrations, etc.

The next section is my calendar.  I opted to just put in our county-created calendar.  Although next year I think I may print my own calendar to make better use of the page.  This was a last minute addition.  I use Google Calendar for most things so this is more of the permanent copy.  Currently this calendar is hanging on the board by my desk.  I like having it in my book all in one place.  However, I still think I like having it out and up on the board.......so we will see if this section gets used.......

After that is my To Do sheets.  I borrowed this idea from Nest Effect.  Tiffany posted a free printable on her blog.  I liked it but I ended up making some adjustments so that it worked for me.  This allows me to record all those To Do's that need to be done but aren't URGENT.  It allows me to put down Due Dates and check off when they are finished.


Behind that are my Notes Sheets.  Sometimes, I meet with teams and we do collaborative projects.  This is where I plan on writing down info about those projects.


Next are my lesson plans.  I have always felt that my planbook pages never worked for me.  I rewrite the same info (Teacher/Grade) each week.  Once I tried to run it through the printer, that looked like CRAP.  What I LOVE about my pages is my Week at a Glance column on the left where I will record meetings and other important things to know about the week.  Then plans for classes in the middle and on the right my specific To Do's and Most Important Tasks that HAVE TO GET DONE!

The last two sections are my Gradebooks.  Here is where my school has its advantage.  We have limited transfers in or out of our school during the actual school year.  So I'm able to print up sheets for my gradebook with student names, logins, computer numbers, and passwords.  One of the sections is for 1st Semester (1st/2nd Quarter) and the other is for 2nd Semester (3rd/4th Quarter).

I had all of this bound at Staples after I printed it. ALL DONE!  It cost me approximately $5.50 to have it bound.  CHEAP!

So now that I had this sucker bound....how can I doll it up a bit more.  The tabs are a bit white PLAIN.  Following along with my Inspiration, I went in search of washi tape.  I found a ton at Target.  I originally was going to use a bunch of different colors but in the end, I caved and went with just one of the rolls, which was a super cute black and white polka dot.  Then I stuck it down on the tabs and used my label maker to create labels.  I'm sure I'll find some other craft project to use the other washi tape for. (insert Evil Crafting Laughter)


I got a pencil pouch (even decorated that with some polka dots) and filled it with some Sharpie Pens in fun colors, post its, and I'm good to GO!!


What do you think?!?


Wednesday, September 5, 2012

Sympathy Card

I wish I was crafting for a better reason but one of our staff members had a sudden death in their family.  So I volunteered to make a sympathy card for our team to sign.  Figured that would get my crafting card crafting butt back in gear.  I got a new stamp set a while back called Betsy's Blossoms and found this cute idea.  I didn't have the colors in the picture or the ribbon but I had the basic other supplies.  Here is what I ended up with.


Paper: Island Indigo, Rich Razzleberry, Whisper White
Stamps: Betsy's Blossoms, Teeny Tiny Wishes
Ink: Pumpkin Pie, Rich Razzleberry, Island Indigo, Lucky Limade
Embellishments: Itty Bitty Banners Dies, Random White Ribbon, Perfect Polka Dots Textured Impressions Folder, Beautiful Wings Embosslits Die, Rhinestone Basics.


Friday, August 31, 2012

Classroom Remodel

I took some photos of my room now that the first week of school is over.  I still have several things to do around the room.  But this will give you the idea.  I'm going to be working on an interactive classroom map but I'm just not ready for that yet.  The kids have really enjoyed all the changes and I'm looking forward to the second week of school!  =)


Thursday, August 23, 2012

Back To School

So I've been busy at school this week.  Here are some photos from my classroom.  I'll share more on the finished product later......but for now it's coming together well.  Just lots left to do in the next 24 hours!  Kids come Monday morning!!!  Excited for them to see all the changes in Technology this year!

From the Doorway

My cart with decals!  =)

Curtains (shower curtains that is)

Bulletin board without a border......the border just arrived this evening in the mail.

The Learning Lounge

Another great idea.  Lining clear bins with scrapbook paper.

Green Screen in the Production Studio Nook

More photos and stuff later!  =)


Friday, August 17, 2012

Classroom Redesign - Laptop Trays

Another find when I was at IKEA were these laptop trays.  They are designed so that you can sit on the floor, bed, or couch and put your laptop on a solid surface.  What I love about them is that they are slanted so you can continue to use proper ergonomics when typing.  I picked up 3 for now.  I plan on using them for a small group of students that need to work collaboratively or for students that just need a break from the same ole, same ole sitting at a table and chairs.  I love that they match my decor too!  SCORE!


Thursday, August 16, 2012

Classroom Redo - Craft Project Gone Awry!

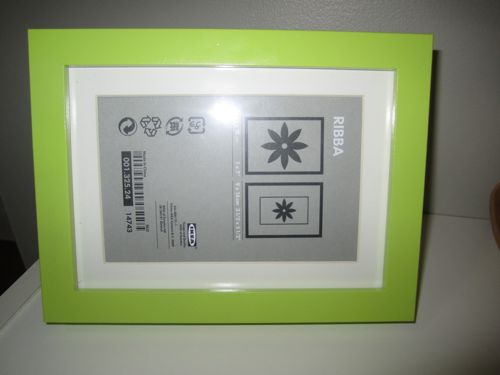
So when I was at IKEA the other day, I got these cute little frames for my desk.  I figured at $1.99 they were a good buy.  I wanted to paint one green and leave the other two black.  This is where things went terribly awry!  The paint chipped right off at touch!  Then I turned it over.  More chipped paint!  So I started to take it off!  It came right off with my fingernail!  Lots of paint remnants.  Ugg.

Unpainted frame

It was a MESS!


All cleaned off and ready to start fresh.

Now that I was back to where I started, I sanded the frame with my sanding block to roughen it up.  Then I washed it down and let it dry well.  This time when I sprayed it with the spray paint, I used thin coats and sprayed it multiple times.  The finished product is much better!


So now I have 2 black frames and one green one.  I think my favorite photo of Taylor will go into the fancy green frame.


Tuesday, August 7, 2012

Classroom Redo - Crate Seats Complete!

Remember those cute crate seats I wrote about here and here?

Well they are finished.  All in all, this project was definitely easy enough for a beginner crafter.  =)  So if you are a teacher out there and you are thinking, I'm not very crafty.......not to worry!  This one is on the easier side.

I ended up making 6 seats!  And here they ARE!  The Lime Green Fabric is looking a little dull in these pictures but I swear it is a beautiful lime green!


Use in the Classroom:  I plan on using these seats as stadium seats in our Interactive Zone (front of the classroom)  They may also be used as the stools for our genius bar.  Just not sure yet how it's all going to shake out.  They could also be possible small tables for laptops if students want to sit on the floor.  Love all the options for use in the classroom.

So that is 3 projects down and I believe I have 2 or 3 more to go.  Maybe More!  It's almost time for school to start back up!  Hard to believe that August 20th will be here before I know it!

On a side note:  I still have an extra 8 pieces of wood precut since I had to buy a whole sheet of plywood.  If you live in the Baltimore Area and are looking for wood precut to make your own seats, please email me, carrietrudden@gmail.com.  They are $1 a piece.  It's definitely cheaper to buy them individually.


Related Posts Plugin for WordPress, Blogger...