Welcome to my Crafting Blog! I'm an avid Stamper, Scrapbooker and all things Crafty! I'm looking forward to sharing my crafting adventures with you!
Showing posts with label Crafts. Show all posts

Thursday, August 16, 2012

Classroom Redo - Craft Project Gone Awry!

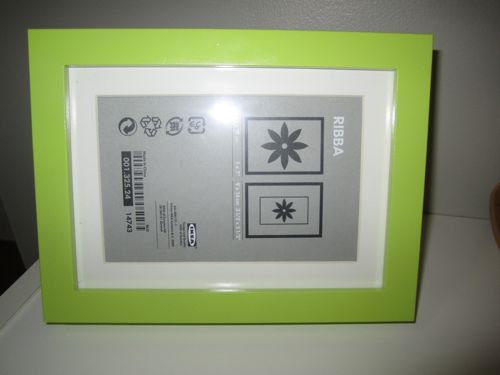
So when I was at IKEA the other day, I got these cute little frames for my desk.  I figured at $1.99 they were a good buy.  I wanted to paint one green and leave the other two black.  This is where things went terribly awry!  The paint chipped right off at touch!  Then I turned it over.  More chipped paint!  So I started to take it off!  It came right off with my fingernail!  Lots of paint remnants.  Ugg.

Unpainted frame

It was a MESS!


All cleaned off and ready to start fresh.

Now that I was back to where I started, I sanded the frame with my sanding block to roughen it up.  Then I washed it down and let it dry well.  This time when I sprayed it with the spray paint, I used thin coats and sprayed it multiple times.  The finished product is much better!


So now I have 2 black frames and one green one.  I think my favorite photo of Taylor will go into the fancy green frame.


Tuesday, August 7, 2012

Classroom Redo - Crate Seats Complete!

Remember those cute crate seats I wrote about here and here?

Well they are finished.  All in all, this project was definitely easy enough for a beginner crafter.  =)  So if you are a teacher out there and you are thinking, I'm not very crafty.......not to worry!  This one is on the easier side.

I ended up making 6 seats!  And here they ARE!  The Lime Green Fabric is looking a little dull in these pictures but I swear it is a beautiful lime green!


Use in the Classroom:  I plan on using these seats as stadium seats in our Interactive Zone (front of the classroom)  They may also be used as the stools for our genius bar.  Just not sure yet how it's all going to shake out.  They could also be possible small tables for laptops if students want to sit on the floor.  Love all the options for use in the classroom.

So that is 3 projects down and I believe I have 2 or 3 more to go.  Maybe More!  It's almost time for school to start back up!  Hard to believe that August 20th will be here before I know it!

On a side note:  I still have an extra 8 pieces of wood precut since I had to buy a whole sheet of plywood.  If you live in the Baltimore Area and are looking for wood precut to make your own seats, please email me, carrietrudden@gmail.com.  They are $1 a piece.  It's definitely cheaper to buy them individually.


Monday, August 6, 2012

Classroom Redo - Supply Bins Complete

Remember those fabulous Supply Bins that I shared with you the other day.  Well tonight, I started thinking about adding the ribbon I temporarily taped on for my photos.  What do you know, I ran into a problem? The sides of the container are slanted.  So if I attached the ribbon there is no way to make it straight without agonizing over its perfection.  Yep OCD much?!?  So I got to thinking....there has to be an easier way to get that damask pattern on the container.  My thoughts immediately went to a  sticker or decal, possibly a stamp.  So I started trolling searching the Internet......and AHA!!  What does Target sell now?!?  Oh for the LOVE of my NEW CLASSROOM!


BINS TRANSFORMED!


 Front

 Back

Imagine if you will, the pens are pencils and the markers are crayons.....They look fabulous don't they?!?  I'm 210% happy with how they turned out.  I like that I have extra room in the front for other extraneous supplies.  Here is the a similar picture with post-its in the space.


So 2 Projects Down!  I think I have 3 More to GO!  Little more than 10 days to go!

Classroom Redo - Signage Complete

Well 1 of my many projects is 100% complete.  I'm very happy with the results.


Each sign is for a different area of my classroom redesigned!  Here's a quick rundown of each.
  • Tech Services: My Desk and my Co-Teachers Desk
  • Interactive Zone: The heart of my classroom.  This is the area known as the front carpet area.  It holds my Smart Board.  It will also be where students can gather and use Laptop Trays (Got a few of these from IKEA), or sit on my fabulous crate seats.  It is also where we, well Interact as a class in a collaborative manner.
  • Genius Bar: Similar to the Apple Store, but these are student Genius'.  My thought is that each class month I pick 2-4 students to serve as the Genius'.  They become the expert for other students to refer to when in need of assistance.
  • Production Studio:  Last year we bought a Green Screen so I wanted a space to have that set up as well as our tripod.  I am also entertaining the idea of setting up some type of backdrop that can be changed.


Sunday, August 5, 2012

Classroom Redo - Supply Bins

Another project that has been coming together and isn't very crafty are my supply bins for tables.  In the past I have used school boxes to hold pencils, crayons, and markers at each table for student use.  This past Spring I caught a great sale at the Target $ Spot on metal tins in Lime Green and Silver.  So I think I ended up getting about 15 total.  Since then I have been looking for just the right plate, platter, or other open bin to attach these tins to.  I originally was thinking a long rectangular plate, like a sushi plate, but these were too expensive when you need 4 or 5.  Then I was thinking maybe I could get a round plastic plate from the summer selections then I would just glue the bins to the plate to ensure that they didn't go anywhere.  No such luck.  Everything I found seemed SO BIG!  Not to mention Expensive!

Today at IKEA I struck gold, well almost.  I saw a display in an office room setup of these beautiful white plastic bins and they were $3.99 a piece.  SCORE!  I forgot my tins at home, so I was eyeballing whether they would fit.  Well these little bins proved more difficult to find in the Marketplace than I expected.  I had to get someone to help me (She was AWESOME BTW!) and even then it was difficult.  I ended up with 2 display bins that had sharpie marker on the bottom, like I care that part will be covered.  =)

I got my 5 bins home and they were PERFECT, well almost.


I wanted to put 3 tins in a bin.....well they don't quite fit.  Another .25" in any direction and I would have been fine.  I can cram them in there but it looks sloppy!


So then I though what about only 2 bins.  There that looks better!  Enter my next Genius Idea!


How about adding some of the left over ribbon from my chalkboards to the bin to make it a little prettier?

I figure the empty space can hold loose supplies like post-its and maybe some scissors, or even maybe flash drives?!?

What do you think?!?


Saturday, August 4, 2012

Crate AKA Stadium Seats - Progress

In my previous post I shared the beginning of my crate seats adventures.  Well, I ended up getting one seat completely finished last night.  I definitely see the advantage of having a staple gun for the fabric at this point, but I do like the way the glue gun finishes things off much neater so I think I'm going to stick with that.  This makes things a little more time consuming but well worth it.  All in all this project is easy enough for any beginning crafter.  I'm going to continue to work on assembly today.  Below is my progress so far.


Friday, August 3, 2012

Crate AKA Stadium Seats - Phase 1

So continuing on my crafting journey this summer and the next stop are some adorable crate seats for my Interactive Theater area.  I am calling these my Stadium Seating.  Woohoo!  Got this fabulous idea from Pinterest, of course!  This is my inspiration.  I have seen other ideas where you make the crate more of a storage container and a seat all in one.  However with my 5th graders, I worry about the strength, so I'm doing as this blogger did and turning my crate upside down and attaching my wood to the bottom.


They aren't complete yet but here is my progress so far.

Step 1: Buy 6 Crates from Target - I even got them on sale!
Step 2: Select Fabric - Got a nice lime green solid fabric from Joann's - 40% off too!
Step 3: Buy other materials - Foam, Spray Adhesive (have already), Sand Paper - I ended up getting a Foam Mattress Pad.  Much cheaper.  However, I got a full when I probably could have gotten away with a Twin.
Step 4: Buy and Cut Plywood - I got a 1/2" piece of plywood at Home Depot.  I had to buy a whole sheet.  FYI a whole sheet will make you about 18 crates.  So I have extra.  About $1 a seat if anyone wants it.  But they cut it for free for me.  So that was nice.
Step 5:  Get to Work.


So I started by sanding all of my plywood.  I didn't spend a whole lot of time on it.  Just gave all the edges a quick go over.  Next I cut my foam and used spray adhesive to stick it to the plywood.  I cut the foam a little bigger than I needed so that I had some wiggle room attaching it.  Finally it's sitting letting the glue set in a pile.  While it's setting, I'm blogging.

So far tonight I've spent about 45 minutes on this project.  My next step tonight is to try to attach the fabric using a glue gun or my E6000 glue.  I decided against staples mostly because I don't have a staple gun and I don't really want to buy something else.  We shall see how that works out.  I might be getting a staple gun tomorrow. ;)

Stay Tuned for more Updates!

Monday, February 27, 2012

More Hair Candy!

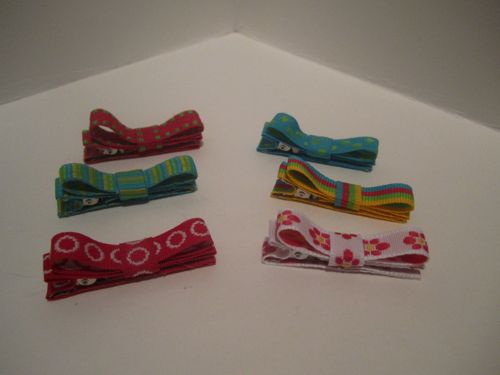
I'm really enjoying and getting into making Taylor "bows."  She is loving them too!  Every morning she points to her head and says "Bow."  It's too cute!  I got some more ribbon from the Target Dollar Spot and some more barrettes.  Armed with my hot glue gun, I have really gotten to work!  Here are some of the barrettes I have finished.  There is even a special St. Patrick's Day one!

Supplies

Set 1

Set 2

Set 3

St. Patrick's Bow!

From another Angle

Learn how to make your own St. Patrick's Day bow!

Sunday, February 5, 2012

Barrettes

So normally my crafts are cards.....but tonight I branched out after making two cards, which I will post tomorrow.  My daughter Taylor has grown more hair recently and she loves putting bows in her hair.  She can even say Bow.  It is too cute.  Every morning after she gets dressed she points to her head where her bow goes and says "Bow."

I have always found that they get lost easily and are $4 for 6 of them.  I found an online tutorial and short ribbon spools at the Target Dollar Spot and figured I would give them a try.  They turned out super cute.  I even got the alligator clips in a 25 count bag super cheap and on sale at Hobby Lobby last week!

I have enough ribbon to make 18 more clips.  So for $6 I have 24 bows for T.  Wahoo!


Wednesday, October 26, 2011

Chocolate Nuggets with a Twist

This summer I made nuggets as favors for my daughter's birthday party!  This evening I needed to make a small gift for a birthday as well as Halloween so I figured they would be a good option.  These make great gifts and are completely customizable!  They run about $2.50 a box!

Birthday Box


Halloween Box


Tuesday, October 25, 2011

I've Been Boo'ed!!

So yesterday at work I found a special treat in my mailbox!  In it was a note that said I had been Boo'ed!  It's now my turn to Boo someone else!  I love this time every year, almost as much as Secret Santa's!  I took the opportunity to make my Mummy Jar that I've been dying to make.  I saw the idea on Pinterest, and I've had the supplies for a little bit now.  It make a cute light you can put on your stoop or porch for Halloween!  I also made a small box of chocolate nuggets as well because you can always use a little chocolate!
What you need: 
 Mason Jar, White Streamers, Googly Eyes, Paint Brush,
Hot Glue, Mod Podge, Spray Sealer, and Tea Light Candles

The jar wrapped up!


Eyes  Hot Glued On!

All Lit Up!  Boo!!!

Candy Box

Candy Box from another Angle!

Yummy Nuggets inside!

Wednesday, October 5, 2011

Crayon Monogram

Our day care provider just built a new home and moved over the weekend.  We wanted to do something special for her because of all that she does for us.  So I decided it would be nice to make her something for her new home to put in her day care area.  I got the design from a pin on my very favorite new site, Pinterest.  Click here for the original post with design.

To make it yourself all you will need is Approx 2-4 boxes of 24 crayola crayons, 1 piece of scrapbook paper, hot glue gun, and small glue dots (these I used to stick down and form the letter before I hot glued the final copy).  I used a die cut from my stamping supplies for the saying.
In Progress

All Done!

From another angle

Taylor excited to give it to Ms. Karyn
Related Posts Plugin for WordPress, Blogger...